
Crystal Structure Analysis on Mac
X-ray crystallography is one of the most direct methods to know the structure of molecules. Nowadays, data analysis of crystal structure can be done free of charge (for non-commercial use) on an individual’s PC. Among the various analysis software available, Olex2 is one of the most popular software now. Olex2 is freeware and has a beautiful screen, and thankfully there is also a Mac version. Here is shown how to install Olex2 for Mac.
How Olex2 works
Olex2 is used in combination with SHELX and PLATON. The analysis is performed on Olex2, and the actual crystal structure analysis is done by SHELX. PLATON help us to do miscellaneous things.
Requirements
To install Olex2, Homebrew, Xquartz, iTerm2 (or normal terminal), and zsh (or bash) are required. If you use Catalina or later, zsh is the default shell.
Homebrew (A Package Manager for Mac) For organic chemists, Homebrew is a very useful software, although it is not as es[…]

Installation of SHELX
You can download SHELX from The SHELX homepage. After you register, you will receive a password for the download.
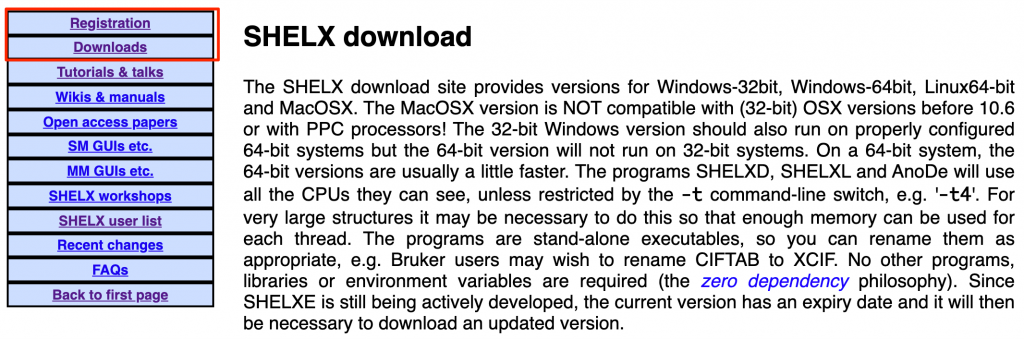
From the download page, download a set of files with the .bz2 extension in the mac folder. If you are doing small molecule analysis, be sure to download shelxt.bz2, shelxl.bz2, and ciftab.bz2. Download them to a folder (for example, in temp folder) in your download folder (~/Downloads).
Next, open iTerm2, move to the temp folder, and extract the bz2 files.
$ cd ~/Downloads/temp  #move to the temp folder
$ bunzip2 *.bz2  #extract all the bz2 files
Next, grant all users execute permissions to the extracted programs.
$ chmod ugo+x shelxt  #Grant execute permissions for all users
$ chmod ugo+x shelxl
$ chmod ugo+x ciftab
$ chmod ugo+x <other extracted files>
Move all these unzipped files to /usr/local/bin.
Restart iTerm2 and use the which command to confirm that the path is valid. If the output looks like the following, you have succeeded.
$ which shelxl #enter this command
/usr/local/bin/shexl
Installation of PLATON
Requirements
To install PLATON, gfortran is required. Check whether the gfortran command is available or not on iTerm2.
$ which gfortran  #enter this command
/usr/local/bin/gfortran  #if installed, you see this answer
gfortran not found  #if not installed, you see this answer
If you see /usr/local/bin/gfortran, gfortran has been installed.
If the message “gfortran not found” is displayed, gfortran is not installed, so install it from Homebrew. gfortran is built into gcc, so install gcc.
$ brew install gcc #If gfortran is not available, install gcc.Installation of PLATON
PLATON is installed according to the manual (pdf) on the platon website. (Some changes have been made.)
Download platon.tar.gz from the platon download site to your download folder (~/Downloads). Unzip it and compile it.
$ cd ~/Downloads  #move to the download folder
$ tar zxvf platon.tar.gz  #extract the files
$ cd platon  #move to the platon folder
$ gunzip *.gz  #extract all the files
$ gfortran -o platon platon.f xdrvr.c -L/opt/X11/lib -lX11 -I/opt/X11/include #compile the file "platon"
The compilation by gfortran will take a while.
- In Mojave, you may get an error message “stdio.h is not present”. In that case, type the following command and execute macOS_SDK_headers_for_macOS_10.14.pkg in the opened folder. After that, execute the above gfortran command again.
$ open /Library/Developer/CommandLineTools/Packages/- In Catalina, you can compile by the following command.
(Thanks Prof. Makoto Yamashita in Nagoya University for this information)
$ gfortran -o platon platon.f xdrvr.c -I/opt/X11/include -L/opt/X11/lib -lX11 --sysroot=/Library/Developer/CommandLineTools/SDKs/MacOSX10.15.sdk- In Big Sur (IntelMac), you can compile by the following command.
“The number part of “11.1.sdk” may depend on the OS version. If you type “MacOSX11” and press the Tab key, the rest of the text will be completed. - In Big Sur (M1 Mac), you can also compile by the following command.
In some case, you see an error “Class AMSupportURLConnectionDelegate is implemented in both ?? ~”, but in most cases, you do not need to worry about this, especially when the generated platon is working.
(Thank Prof. Ami Saito in the University of Tokyo for the information.)
$ gfortran -o platon platon.f xdrvr.c -I/opt/X11/include -L/opt/X11/lib -lX11 --sysroot=/Library/Developer/CommandLineTools/SDKs/MacOSX11.1.sdkAfter compilation, a file “platon” will be generated. Copy this file and check.def into /usr/local/bin with the following command.
$ cp platon /usr/local/bin/. #copy the file "platon" to /usr/local/bin/. Do not forget the period at the end
$ cp check.def /usr/local/bin/.
$ chmod -R 755 /usr/local/bin/platon #change the permissions of the file "platon" to make it executable.
$ chmod -R 755 /usr/local/bin/check.def #change the permissions of the file "check.def" to make it executable.
Settings for PLATON
Set the location of check.def in the environment variable CHECKDEF, which is used in the VALIDATION of cif files. The varible is set to the XQuartz shell. If you have not changed the shell, it should be bash (or zsh for Catalina and later), so set it to .bashrc (or .zshrc for Catalina and later). Recent Macs do not have a bash configuration files, .bashrc, or .bash_profile, so you will start by creating them (for Catalina or later, it is not necessary to create .bashrc and .bash_profile).
$ cd  #move to the home folder
$ touch .bash_profile  #make .bash_profile
$ touch .bashrc  #make .bashrc
Write the following into .bash_profile (not required for Catalina and later).
Files that begin with a “. ” (period) is a hidden file and cannot be seen from the Finder. So, It is easy to open from an editor such as VSCode or vim.
if [ -f ~/.bashrc ] ; then
. ~/.bashrc
fi
Write the following contents in .bashrc. (After Catalina, it is written in .zshrc)
export CHECKDEF='/usr/local/bin/check.def'Installation of Olex2
Installation of Olex2
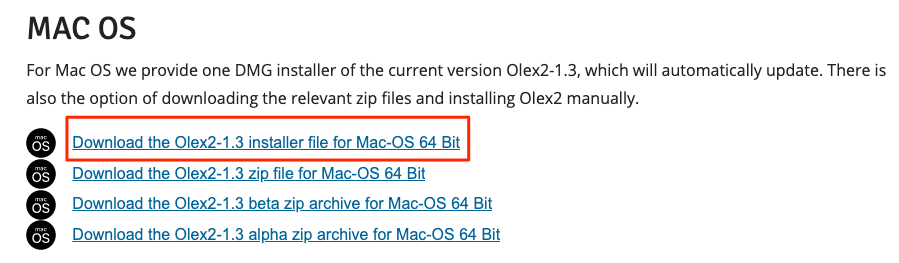
Download and install the most recent Olex2 from the Olex2 website, OlexSys.
Settings for Olex2
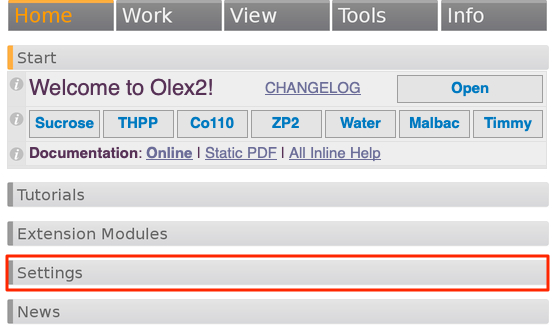
You will need to specify the paths for SHELX and PLATON. Start Olex2, click “Settings” in “Home” to expand it, and enter /usr/local/bin in the PATH: field that appears.
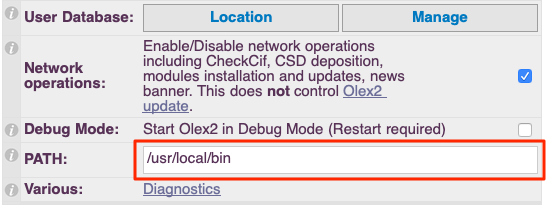
Then reboot. If the path is recognized successfully, the PTON button will appear in the icon field. Click on it to start PLATON. SHELX will also be recognized, and you will be able to select SHELXT in Solve and SHELXL in Least Squares (LS).

- If Olex2 is too slow
If Olex2 is running slowly, try reducing the number of lines displayed in [Tools]-[Settings]-[Lines of Text]. The more you reduce the number of lines displayed, the more it will run. - If PLATON does not work
First, from the command line, use the which command to make sure that the path to platon is passed.
$ which platon  # check where platon is
/usr/local/bin/platon  #If it looks like this, it's OK.
If you see “platon not found”, it means platon has not been copied to /usr/local/bin, or you do not have permission to run it (permission setting failed).
After confirming that the path to platon has been successfully passed, try to run platon from the command line.
$ platonIf platon starts, it is OK. If you get an error and platon does not start, you will need to re-install platon.